
 Home & Kitchen
 Beauty & Lifestyle
 Health & Selfcare
 Office & Stationery
 Sport
Sport Toys
ToysHow to Install Astro Turf Artificial Grass: A Step-by-Step Guide
Installing astro turf artificial grass can be a great solution for homeowners who want a beautiful, low-maintenance lawn that looks green all year round. However, the installation process can be a bit tricky, especially for those who are not familiar with the process.
In this step-by-step guide, we will walk you through the process of installing artificial grass so that you can create the perfect outdoor space for your home. From preparing the ground to laying down the turf and adding finishing touches, we will cover everything you need to know to ensure that your new lawn looks great and lasts for years to come.
With a little bit of time and effort, you can have the perfect outdoor space for entertaining guests, relaxing with family, or just enjoying the great outdoors.
So, let’s get started!
Tools and Materials Needed
Before you start installing astro turf grass, it’s important to gather all the necessary tools and materials. This is what you’ll need:
- Tape measure: You will need to measure the area where you plan to install the artificial grass to ensure that you purchase the correct amount of turf.
- Utility knife: You will need a sharp utility knife to cut the astro artificial grass to fit the shape of your lawn.
- Sand or crushed stone: This is used as a base layer under the artificial grass to provide stability and drainage.
- Weed barrier fabric: This is a layer of fabric that is placed between the base layer and the artificial grass to prevent weeds from growing through.
- Astro turf artificial grass: Purchase enough turf to cover the area you measured.
- Lawn edging: This will be used to secure the edges of the astro artificial grass in the place.
- Lawn seaming tape: This is a special tape used to join two pieces of astro turf grass together.
- Lawn adhesive: This is a glue that is used to secure the lawn seaming tape in place.
- Stakes or staples: These are used to secure the astro turf artificial grass in place.
By gathering all of these tools and materials before you start, you can ensure that the installation process goes smoothly and that your astro turf grass looks great when it’s finished.
Step One: Preparing the Area for Installation
The first step in installing Astro Turf artificial grass is to prepare the area where you will be laying the turf. This involves removing any existing grass or debris, and ensuring that the ground is level and compact.
Here are the detailed steps for preparing the area:
Remove existing grass and debris:
Use a shovel or turf cutter to remove any existing grass, weeds, or debris from the area where you will be installing the artificial grass.
Level the ground:
Ensure that the ground is level by removing any high spots and filling in any low spots. A level surface will ensure that your artificial grass is even and looks natural.
Compact the ground:
Compact the soil with a hand tamper, or plate compactor. This will help to create a stable base for your artificial grass.
Install a weed barrier:
To prevent weeds from growing through your artificial grass, install a weed barrier. You can use a geotextile fabric or a weed barrier membrane.
By following these steps, you will be able to prepare the area for your Astro Turf artificial grass installation, ensuring that it is even, stable, and free from weeds.
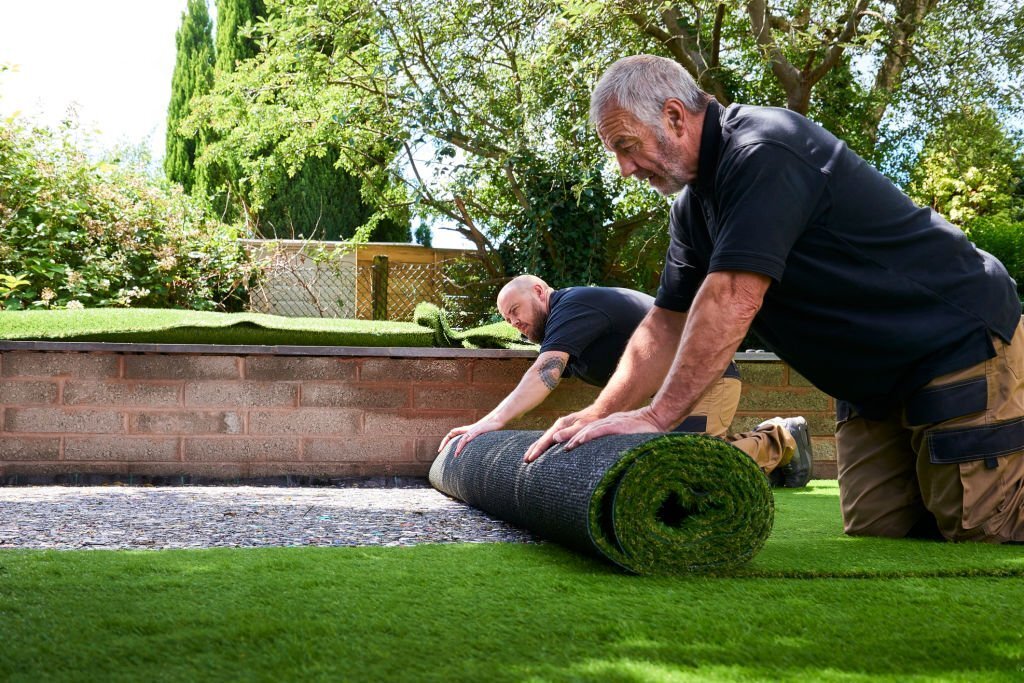
Step Two: Laying the Astro Turf Artificial Grass
Once you have prepared the area, it’s time to lay the artificial grass. Here’s how to do it:
- Roll out the artificial grass over the prepared surface. Allow the turf to settle for a few hours before proceeding with the installation.
- Cut the turf into the required size and shape using a sharp utility knife. Make sure the edges fit together tightly without any gaps.
- Join the different pieces of turf using artificial grass seam tape and adhesive. Place the tape underneath the seam and apply the adhesive on top of it.
- Nail down the edges of the artificial grass to keep them in place. Make sure the nails are secure and not visible on the surface.
- Trim the edges of the artificial grass with a utility knife for a neat finish.
- Spread the infill material evenly over the artificial grass to provide cushioning and support. Make sure the infill material is evenly distributed and there are no lumps or bumps.
Once you have laid the artificial grass, it’s time to move on to the final step of the installation process, which is securing the edges and adding the finishing touches.
Step Three: Securing the Astro Turf Artificial Grass
After the artificial grass has been laid out, the next step is to secure it in place. You can do this by using either adhesive or nails. For adhesive, simply apply it on the perimeter of the area where the artificial grass has been placed.
Use a trowel or a spreader to evenly distribute the adhesive. Make sure to follow the manufacturer’s instructions when using the adhesive. Alternatively, you can use nails to secure the artificial grass.
Use 6-8 inch nails and place them around the perimeter, making sure they are spaced evenly. Once you have secured the artificial grass, trim any excess turf that may be hanging off the edges.
Step Four: Finishing Touches
It’s now time to finish the job. This step involves trimming the edges of the grass to fit the shape of the installation area. A utility knife or scissors can be used for this task. It’s important to be careful when cutting the edges to avoid damaging the grass fibers.
Once the edges are trimmed, a layer of infill material can be added to the grass. This helps to keep the fibers standing upright and provides cushioning for the grass. The infill material can be brushed into the fibers using a stiff-bristled broom.
Finally, the area can be hosed down to remove any debris or loose infill.
Conclusion:
In conclusion, installing astro turf artificial grass can be a great way to achieve a lush, green lawn without the hassle of regular maintenance. However, it is important to properly prepare the area, lay the turf correctly, and secure it in place to ensure a long-lasting and beautiful result. With the right tools and materials, as well as following the step-by-step guide outlined in this blog post, you can successfully install astroturf artificial grass in your own backyard. Whether you are looking to enhance your outdoor living space, reduce your water consumption, or simply enjoy a stunning lawn all year round, artificial grass can be a fantastic investment for any homeowner.
Upgrade your outdoor space with Astro Turf Artificial Grass. Follow our step-by-step guide to install it flawlessly. Shop now at DMART for all your landscaping needs.